Note
Go to the end to download the full example code. or to run this example in your browser via Binder
Minimal example script#
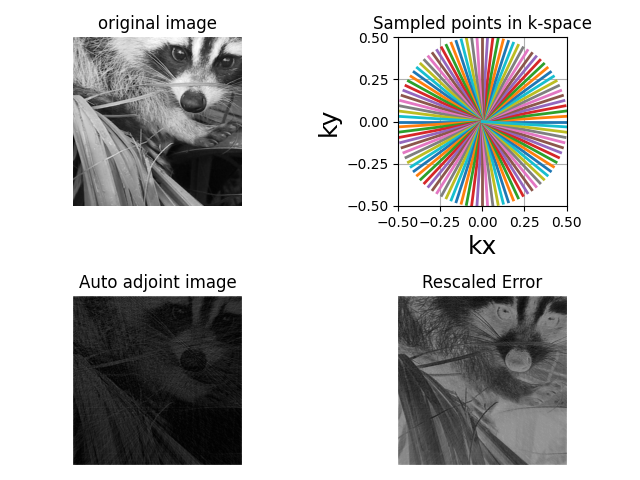
An example to show how to perform a simple NUFFT.
import matplotlib.pyplot as plt
import numpy as np
from scipy.datasets import face

import mrinufft
from mrinufft.density import voronoi
from mrinufft.trajectories import display

# Create a 2D radial trajectory for demo
samples_loc = mrinufft.initialize_2D_radial(Nc=100, Ns=500)
# Get a 2D image for the demo (512x512)
image = np.complex64(face(gray=True)[256:768, 256:768])

## The real deal starts here ##
# Choose your NUFFT backend (installed independly from the package)
NufftOperator = mrinufft.get_operator("finufft")

# For better image quality we use a density compensation
density = voronoi(samples_loc)

# And create the associated operator
nufft = NufftOperator(
    samples_loc, shape=image.shape, density=density, n_coils=1, squeeze_dims=True
)

kspace_data = nufft.op(image)  # Image -> K-space
image2 = nufft.adj_op(kspace_data)  # K-space -> Image
/volatile/github-ci-mind-inria/gpu_runner2/_work/mri-nufft/venv/lib/python3.10/site-packages/mrinufft/_utils.py:94: UserWarning: Samples will be rescaled to [-pi, pi), assuming they were in [-0.5, 0.5)
  warnings.warn(
# Show the results
fig, ax = plt.subplots(2, 2)
ax = ax.flatten()
# Upper left reference image
ax[0].imshow(abs(image), cmap="gray")
ax[0].axis("off")
ax[0].set_title("original image")
# Upper right trajectory
display.display_2D_trajectory(samples_loc, subfigure=ax[1])
ax[1].set_aspect("equal")
ax[1].set_title("Sampled points in k-space")
# Bottom left reconstructed image
ax[2].imshow(abs(image2), cmap="gray")
ax[2].axis("off")
ax[2].set_title("Auto adjoint image")
# Bottom right error
ax[3].imshow(
    abs(image2) / np.max(abs(image2)) - abs(image) / np.max(abs(image)), cmap="gray"
)
ax[3].axis("off")
ax[3].set_title("Rescaled Error")
plt.tight_layout()
plt.show()

Note
This resulting image is not the same as the original one because the NUFFT operator is not a perfect inverse operation but an adjoint, and we undersampled by a factor of 5. The reconstruction artifacts can be removed by using an iterative reconstruction method. Check PySAP-mri documentation for examples.
Total running time of the script: (0 minutes 3.099 seconds)
